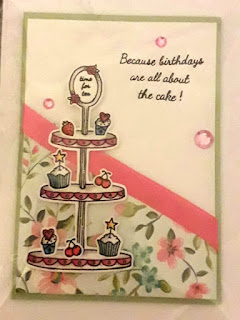
Although I set up this blog as a page to feature my crafty journey into the realms of card making and cake decorating; I couldn't help but go of tangent and make at least one lifestyle type post.
During the Summer of 2018 we decided to take a vacation to the City of Love - Paris.
The main reason for our trip to Paris was to visit a family friend who lives on the southern suburbs, in the picturesque town of L'Haÿ-les-Roses. This quaint commune gets its name from the many rose gardens that lie within; the most famous being Roseraie de L'Haÿ which was created in 1899 by Jules Gravereaux. Unfortunately the timing of our visit being Mid-August, meant the rose gardens had past their bloom; so I couldn't capture any photos of its full beauty; however I wish to say it is none the less a remarkable place to visit.
As breathtaking a town as L'Haÿ-les-Roses is, we did decide to spend some of the time venturing into Central Paris, to see some of its top attractions.

 Our mornings would start in yet another whimsical suburb, Bourg-la-Reine, from where we would get the 'RER B' to Gare du Nord station and from there either take Paris' metro, a bus or walk to our destination.
A warning to any Londoners visiting Paris and using the metro for the first time - there is a very distinct smell while on board which may shock you when compared to London Tube Lines! None the less I would say taking the Metro is a rather inexpensive and convenient way to see the sights that Paris has to offer.

35, Rue Du Chevalier-De-La-Barre 75018 Paris, France | La Basilique du Sacré Cœur opening hours; May to September: 8.30 a.m - 8 p.m, October to April: 9 a.m - 5 p.m. | Entrance to the Main Church is Free, The Dome and Crypt carry a cost which varies.

 La Tour Eiffel or the Eiffel Tower as we call it in England is arguably the most famous landmark Paris has to offer, and it was here that we decided to spend our 2nd day (and part of the night). Set in the green space of Champ de Mars, the area is completely filled with tourists wanting to get a glimpse (and picture) of the iconic structure.
La Basilique du Sacré Cœur

On the 1st Day of our stay, we decided to journey to Montmarte to see La Basilique du Sacré Cœur. Located at the summit of the butte; over 130 meters of the ground; The Sacré-Cœur has the highest view point in the whole of Paris.
To make it to the Main Church we had to climb up numerous steps that were lined with both people enjoying the sunny weather as well as street vendors selling knick-knacks and water bottles. By the entrance steps were two street artists, the first a cartoon expressionist, who was busy sketching and the second was cutting out silhouettes of peoples faces. A little bit further from them stood another street vendor, this one pleating friendship bracelets around a tourist's arm.
The inside is just as beautiful as the outside. Circled around the nave are many statues and alters dedicated to different saints, as well as a scale model of the church contained within a glass box. However it was 'The Apse Mosaic' set into the middle dome of the ceiling that really captured my eye.
35, Rue Du Chevalier-De-La-Barre 75018 Paris, France | La Basilique du Sacré Cœur opening hours; May to September: 8.30 a.m - 8 p.m, October to April: 9 a.m - 5 p.m. | Entrance to the Main Church is Free, The Dome and Crypt carry a cost which varies.
La Tour Eiffel

 La Tour Eiffel or the Eiffel Tower as we call it in England is arguably the most famous landmark Paris has to offer, and it was here that we decided to spend our 2nd day (and part of the night). Set in the green space of Champ de Mars, the area is completely filled with tourists wanting to get a glimpse (and picture) of the iconic structure.
Before embarking on our climb of over 700 steps to the 2nd floor we decided to walk around Champ de Mars and take a look at the market stalls that were set up at the side selling local wares, food and drinks. There were also some carnival game stalls such as 'Hook a Duck' which really reminded me of my childhood.
The views from both the first and second floors are incredible and despite the hundreds of other people that were also on the tower it didn't feel crowded. I felt we had clearly come at the right time as it was beautiful to look out over Paris just as the sun set.
Champ de Mars, 5 Avenue Anatole France, 75007 Paris, France | La Tour Eiffel opening hours; 21 June - 2 September: 9 a.m - 12:45 a.m, Rest of year: 9:30 a.m - 11:45 p.m. | Ticket with access lift (Second floor): €16, Ticket with access lift (The top): €25, Ticket with access stairs
(Second floor): €10, Ticket with access stairs (Second floor) and lift (The top): €19
(Second floor): €10, Ticket with access stairs (Second floor) and lift (The top): €19
Musee du Louvre

On the 3rd Day of our stay, we decided to visit Musee du Louvre - which is the world's largest (and in my personal opinion - the world's best) art museum.
We arrived early in time for the 9am opening; hoping it wouldn't be to busy first thing in the morning. At this time the queue seemed to move rather quickly, plus it was a really sunny day so we didn't mind having to stand outside a little while.
To avoid queues you can pre-purchase tickets online for the Louvre, as with the other places we visited, but as we were unsure of when we wanted to visit each location, we left our ticket buying until we arrived.

 This turned out to be a positive choice, as we found out while in the ticket line, that I wouldn't need to pay to enter, as all 18-25 year-old residents of the European Economic Area can gain free admission to the museum, just by carrying a form of Photo ID such as a Passport, a National Identity Card or a Driving Licence.
The Louvre consists of 3 Wings - Richelieu, Sully and Denon - and is home to numerous exhibitions; including The Winged Victory, The Wedding Feast at Cana, The Great Sphinx of Tanis, The Napoleon III Apartments, and of course - The Mona Lisa.
Rue de Rivoli, 75001 Paris, France | Musée du Louvre opening hours; Monday: 9 a.m.– 6 p.m, Tuesday: Closed, Wednesday: 9 a.m.– 9:45 p.m, Thursday: 9 a.m.– 6 p.m, Friday: 9 a.m.– 9:45 p.m, Saturday: 9 a.m.– 6 p.m, Sunday: 9 a.m.– 6 p.m. | Tickets purchased online: €17, Tickets purchased at the museum: €15
To avoid queues you can pre-purchase tickets online for the Louvre, as with the other places we visited, but as we were unsure of when we wanted to visit each location, we left our ticket buying until we arrived.

 This turned out to be a positive choice, as we found out while in the ticket line, that I wouldn't need to pay to enter, as all 18-25 year-old residents of the European Economic Area can gain free admission to the museum, just by carrying a form of Photo ID such as a Passport, a National Identity Card or a Driving Licence.
The Louvre consists of 3 Wings - Richelieu, Sully and Denon - and is home to numerous exhibitions; including The Winged Victory, The Wedding Feast at Cana, The Great Sphinx of Tanis, The Napoleon III Apartments, and of course - The Mona Lisa.
Rue de Rivoli, 75001 Paris, France | Musée du Louvre opening hours; Monday: 9 a.m.– 6 p.m, Tuesday: Closed, Wednesday: 9 a.m.– 9:45 p.m, Thursday: 9 a.m.– 6 p.m, Friday: 9 a.m.– 9:45 p.m, Saturday: 9 a.m.– 6 p.m, Sunday: 9 a.m.– 6 p.m. | Tickets purchased online: €17, Tickets purchased at the museum: €15
- Musee Du Louvre - https://www.louvre.fr/en
- Tour Effiel - https://www.toureiffel.paris/en
- La Basilique du Sacré Cœur - http://www.sacre-coeur-montmartre.com/english/